Combining smart switches and smart lights
Lighting is core to any smart home system. The systems attempt to make it as accessible as possible; there shouldn’t be a need to search for a light switch when entering a walkway a motion sensor should take care of it, there shouldn’t be a need to have to get out of bed to switch out the light before going to sleep, there shouldn’t be a need to run around every room before leaving the house to ensure lights are off and there shouldn’t be a need to manually turn on and off your outdoor lights every night.
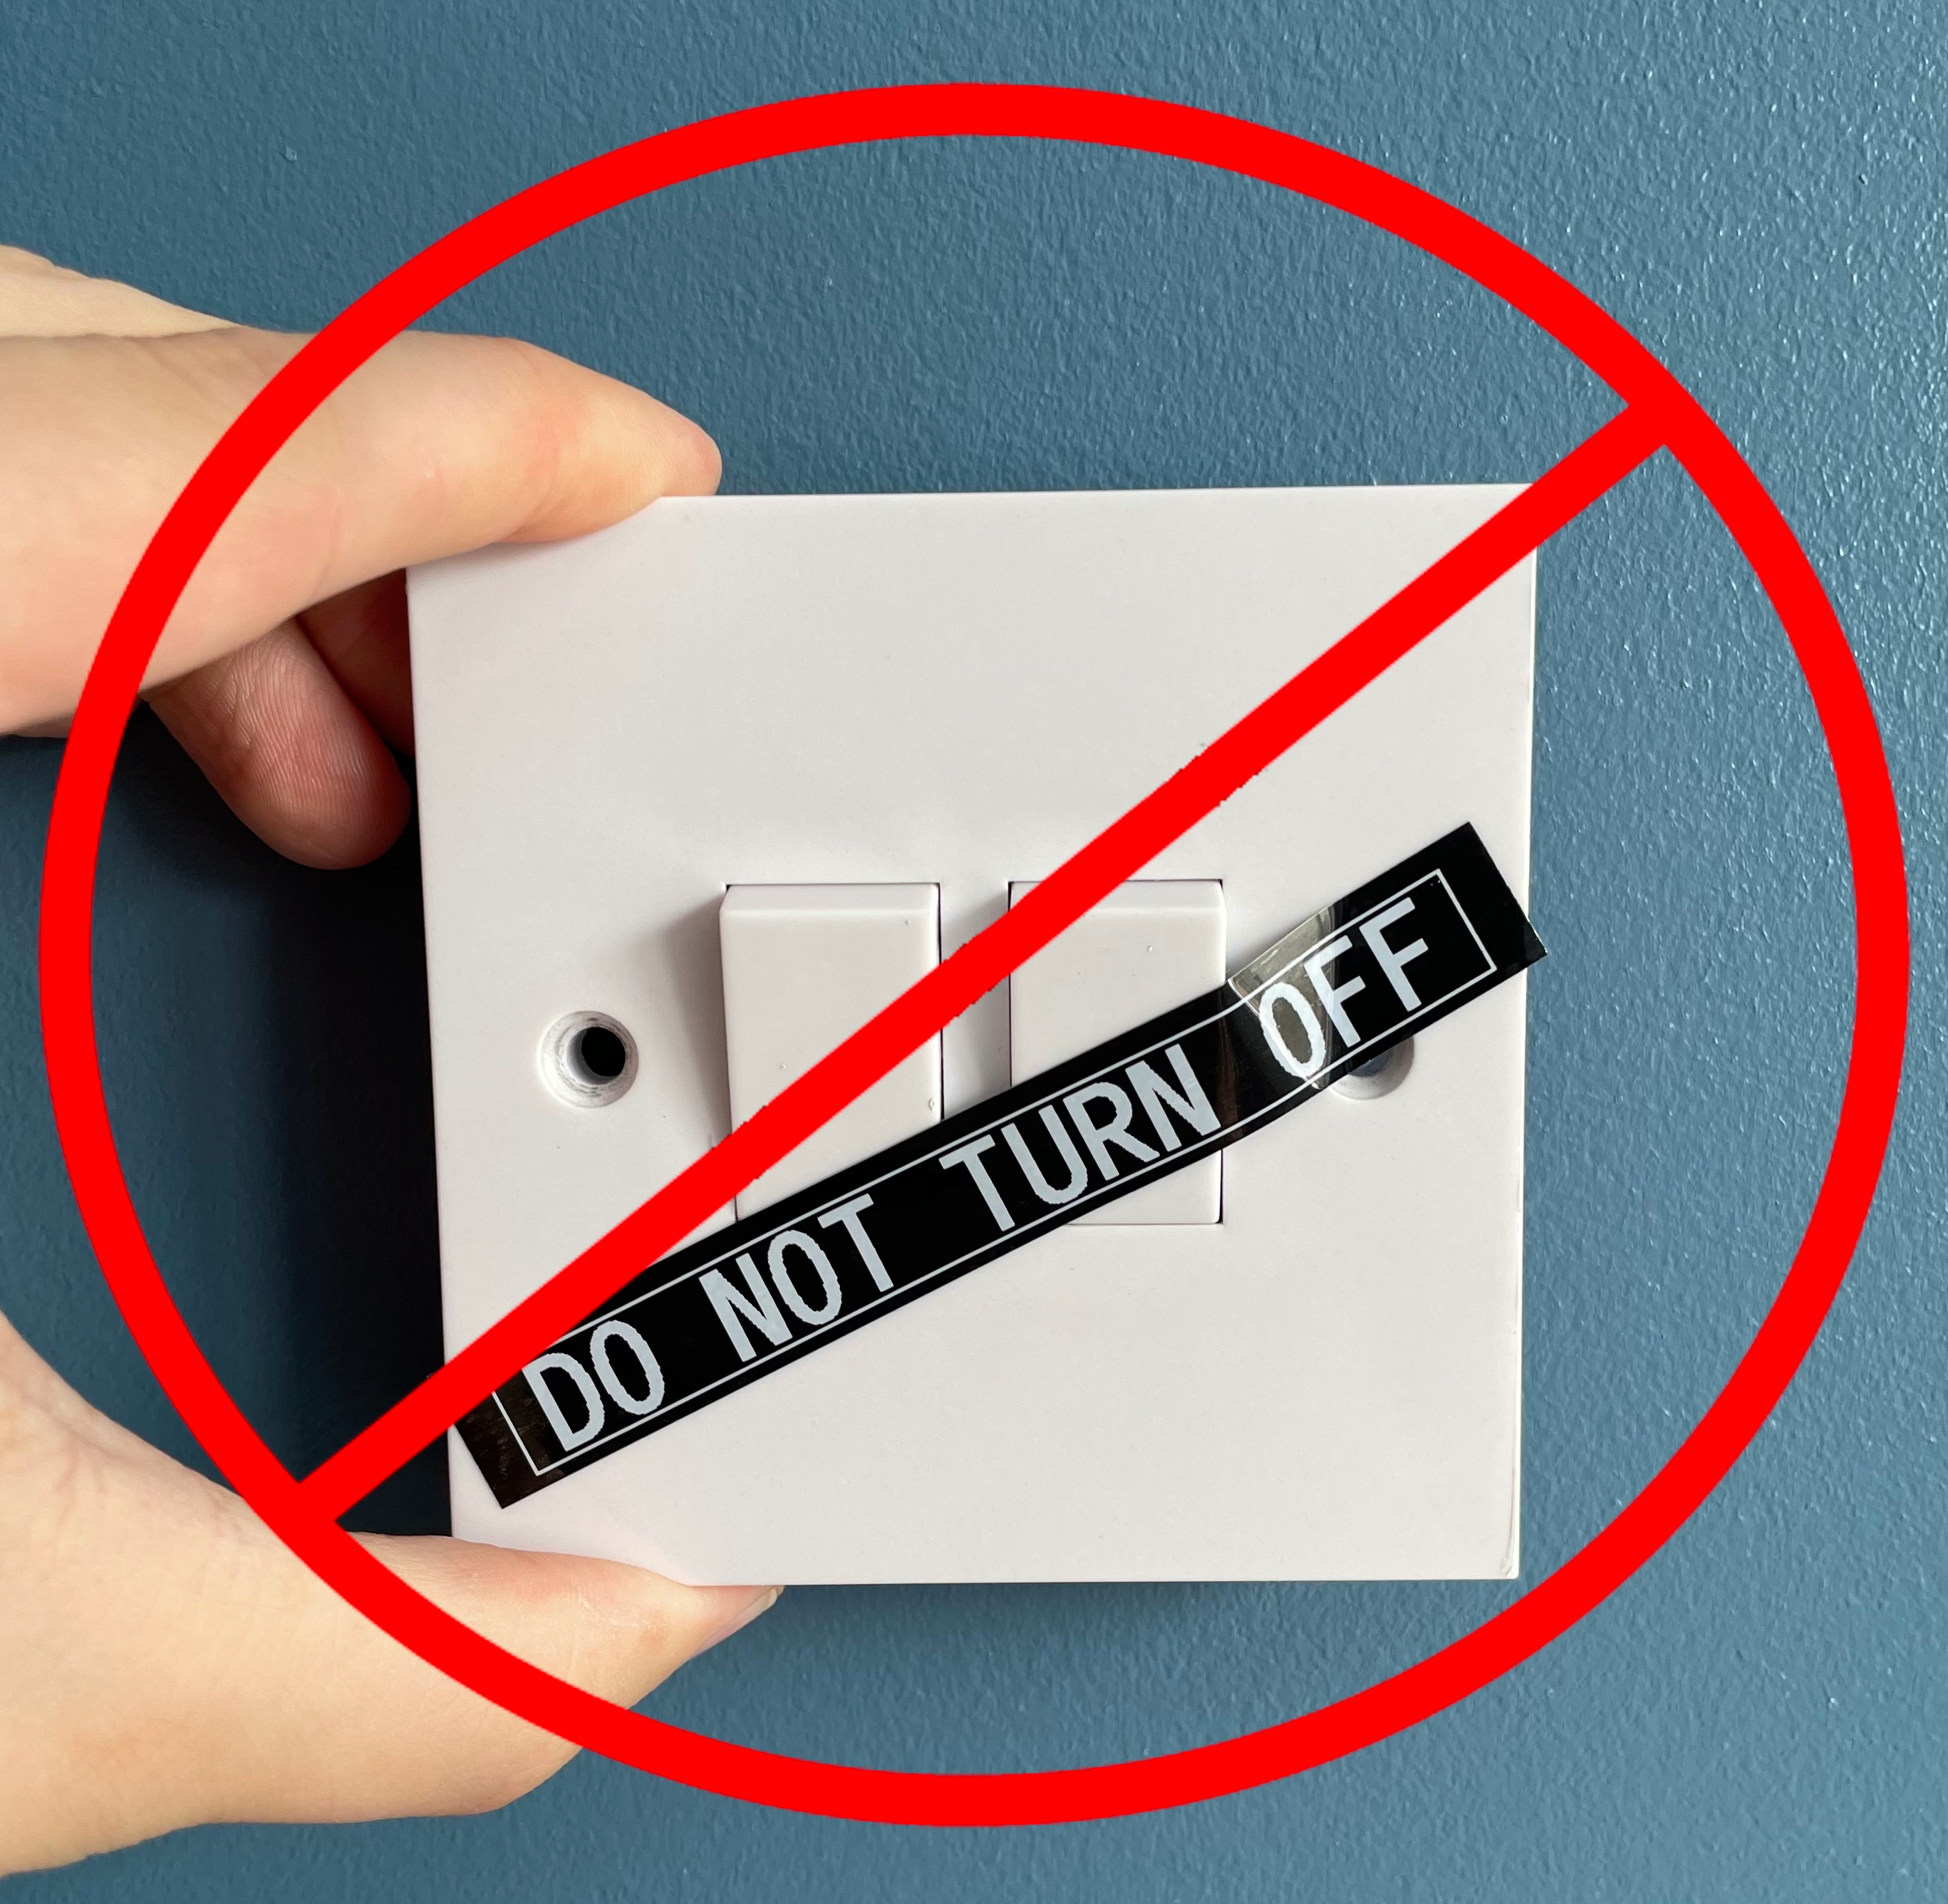
While there are many lighting products on the smart home market their implementation of them leaves a lot to be desired. In general, I believe the user experience of them is poor, this post will hopefully show you that there is a better way to have all the benefits of smart lighting without the poor user experience features of tape across light switches or warning signs saying to not turn them off. An important goal for me when introducing any smart home technology into my home is that the dumb functionality works in parallel to the smart functionality and in the event of failure of the smart functionality.
Requirements for my smart lighting setup
- A physical light switch should still work to toggle a light on/off
- The system should be WiFi based, I already have lots of access points
- There should be no dependency on internet connectivity
- Support for smart bulbs and fancy LED light fittings should exist
- Both the bulbs and light switches should be based on ESP chips to allow flashing with an opensource firmware
Products
A smart light switch can be used on its own. However, a smart bulb needs to be combined with a smart light switch for a good user experience.
My general approach to product selection is anything that runs Tasmota, https://templates.blakadder.com/ provides a fantastic catalogue of these products.
For my setup I ended up with:
Switches:
Bulbs:
I do not recommend the switches I got or any touch-capacitive light switches, the feedback on them is poor and they are overly sensitive. At the time of purchasing, there weren’t any physical buttons/switches available, thankfully this has now changed.
The Novostella light bulbs are no longer flashable with Tasmota so they are no longer worth purchasing. The Athom bulbs come pre-flashed with Tasmota and are my preferred choice.
I have since purchased other switches/bulbs to test out, while they work well I’m in no position to replace everything at present:
Switches
The Sonoff switches are the most aesthetically pleasing in my opinion, they require manual flashing to Tasmota but the process is straightforward.
The Athom switch comes preflashed with Tasmota and likely provides the most friendly installation experience.
The Shelly relays are OTA flashable, however, they require a deep back box and could make for a tight fit.
Bulbs
The Athom bulbs come preflashed with Tasmota. They are available with both an E27 and B22 connector on the Athom store.
The Shelly bulbs are OTA flashable. However, as they are not available in a B22 socket form they aren’t of much use for ceiling lights.
Product selection in hindsight
In the event I was to purchase all my smart home lighting equipment again it would be a mix of the Sonoff M5 switches and the Athom bulbs.
Switch configuration
To get the light switch and bulb to work well together it’s best to maintain a constant live feed to the bulb. This can be done in Tasmota by disconnecting the buttons and status LEDs from the relays and pointing them at other Tasmota devices via the Tasmota device groups feature.
Forcing a constant live feed to the bulb can be achieved by modifying Tasmota’s template:
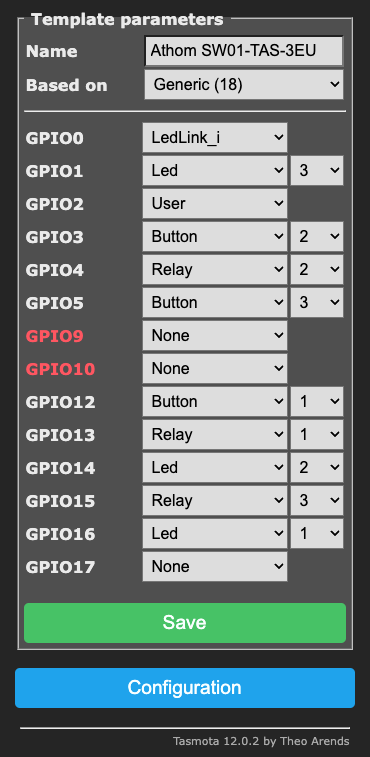
Taking Relay 1 on GPIO13 for example, we can see it has a LED on GPIO16 and a Button on GPIO12 mapped to it, as a result pressing the Button connected to GPIO12 will toggle Relay 1 and LED 1.
There is a bunch of different methods to disconnect the buttons from the relays but my preferred method is as follows:
- Change the
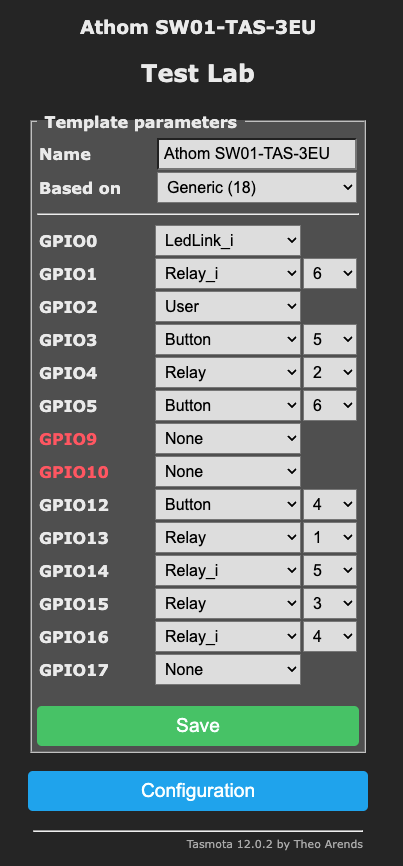
LEDtoRelay_iand assign it a relay number oforiginal + amount of real relays, so for example on a 3 gang switch LED 1 would be1 + 3 = 4, LED 2 would be2 + 3 = 5, LED 3 would be3 + 3 = 6 - Change the buttons so that they map to the newly created Relays on the LEDs, That is button1 becomes button4, button2 becomes button5 and button3 becomes button6
With this change made, the template page looks like the following:
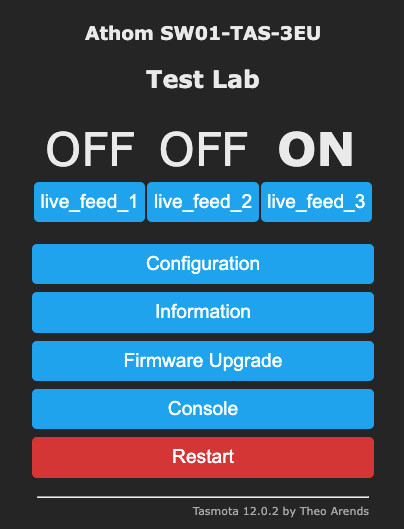
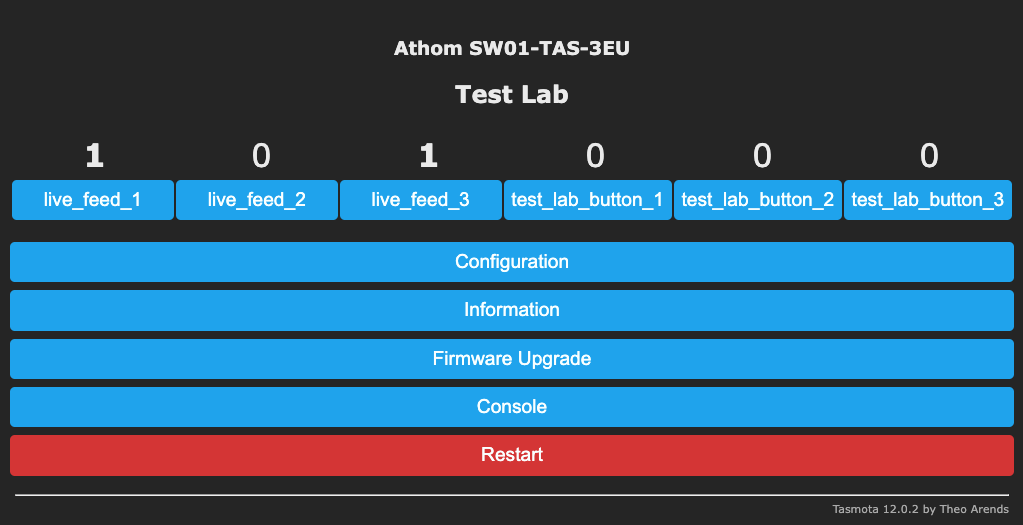
Pressing the physical buttons on the light switch now just results in the status LED toggling, additionally, more buttons have appeared on the Tasmota web interface:
Device syncing
Finally, the device groups can be configured to sync on/off status with other devices.
From the switch, navigate to the console page and execute the following:
- Enable the device group feature
SetOption85 1 - Name all the device groups
devgroupname1 ceiling_lightdevgroupname2 lamp - Associate each of the relays to a unique device group
SetOption88 1 - Tie the different device groups to your different buttons.
devgrouptie1 4would sync LED4/Button4 with devgroup ceiling_light
From the device you wish to control, navigate to its console page and execute the following:
- Enable the device group feature
SetOption85 1 - Name all the device groups
devgroupname1 ceiling_light
Pressing what was originally Button1 should now toggle ceiling_light. At this point, you should have control of your bulb via your voice assistant, the tasmota web interface, home assistant or a similar 3rd party smart home system, and lastly, the light switch where pressing the light switch doesn’t cut the power and impair the other toggling methods. This leaves you in a good position to start extending your lighting setup with automations.