Live TV distribution and centralised recording
Disclaimer: The following setup is for personal distribution purposes only. If you have a TV tuner a TV license must be held.
Live TV isn’t often used in my household as most of the content we consume is via streaming services (Netflix, Disney+, Amazon Prime). I wanted a selection of Live TV to be available for those moments when we aren’t interested in committing to a 2 hour movie, season long show, or RTE were doing their yearly live broadcast of the late late Toy Show and I didn’t want to rely on their ever failing web player.
I have no interest in paying for Sky or similar services as it is difficult to justify the cost given the limited use it would get. Additionally, I had no interest in exploring gray area legalities of “dodgy boxes” or IPTV providers. The combination of Saorview (RTEs, Virgin Medias, etc) and Freesat (BBCs, ITVs, Channel4, 5, etc.) was ideal as it provides all of the free channels. It just left the question, how do I distribute these to all devices within my household and have a Sky+ like experience for recording and pausing?
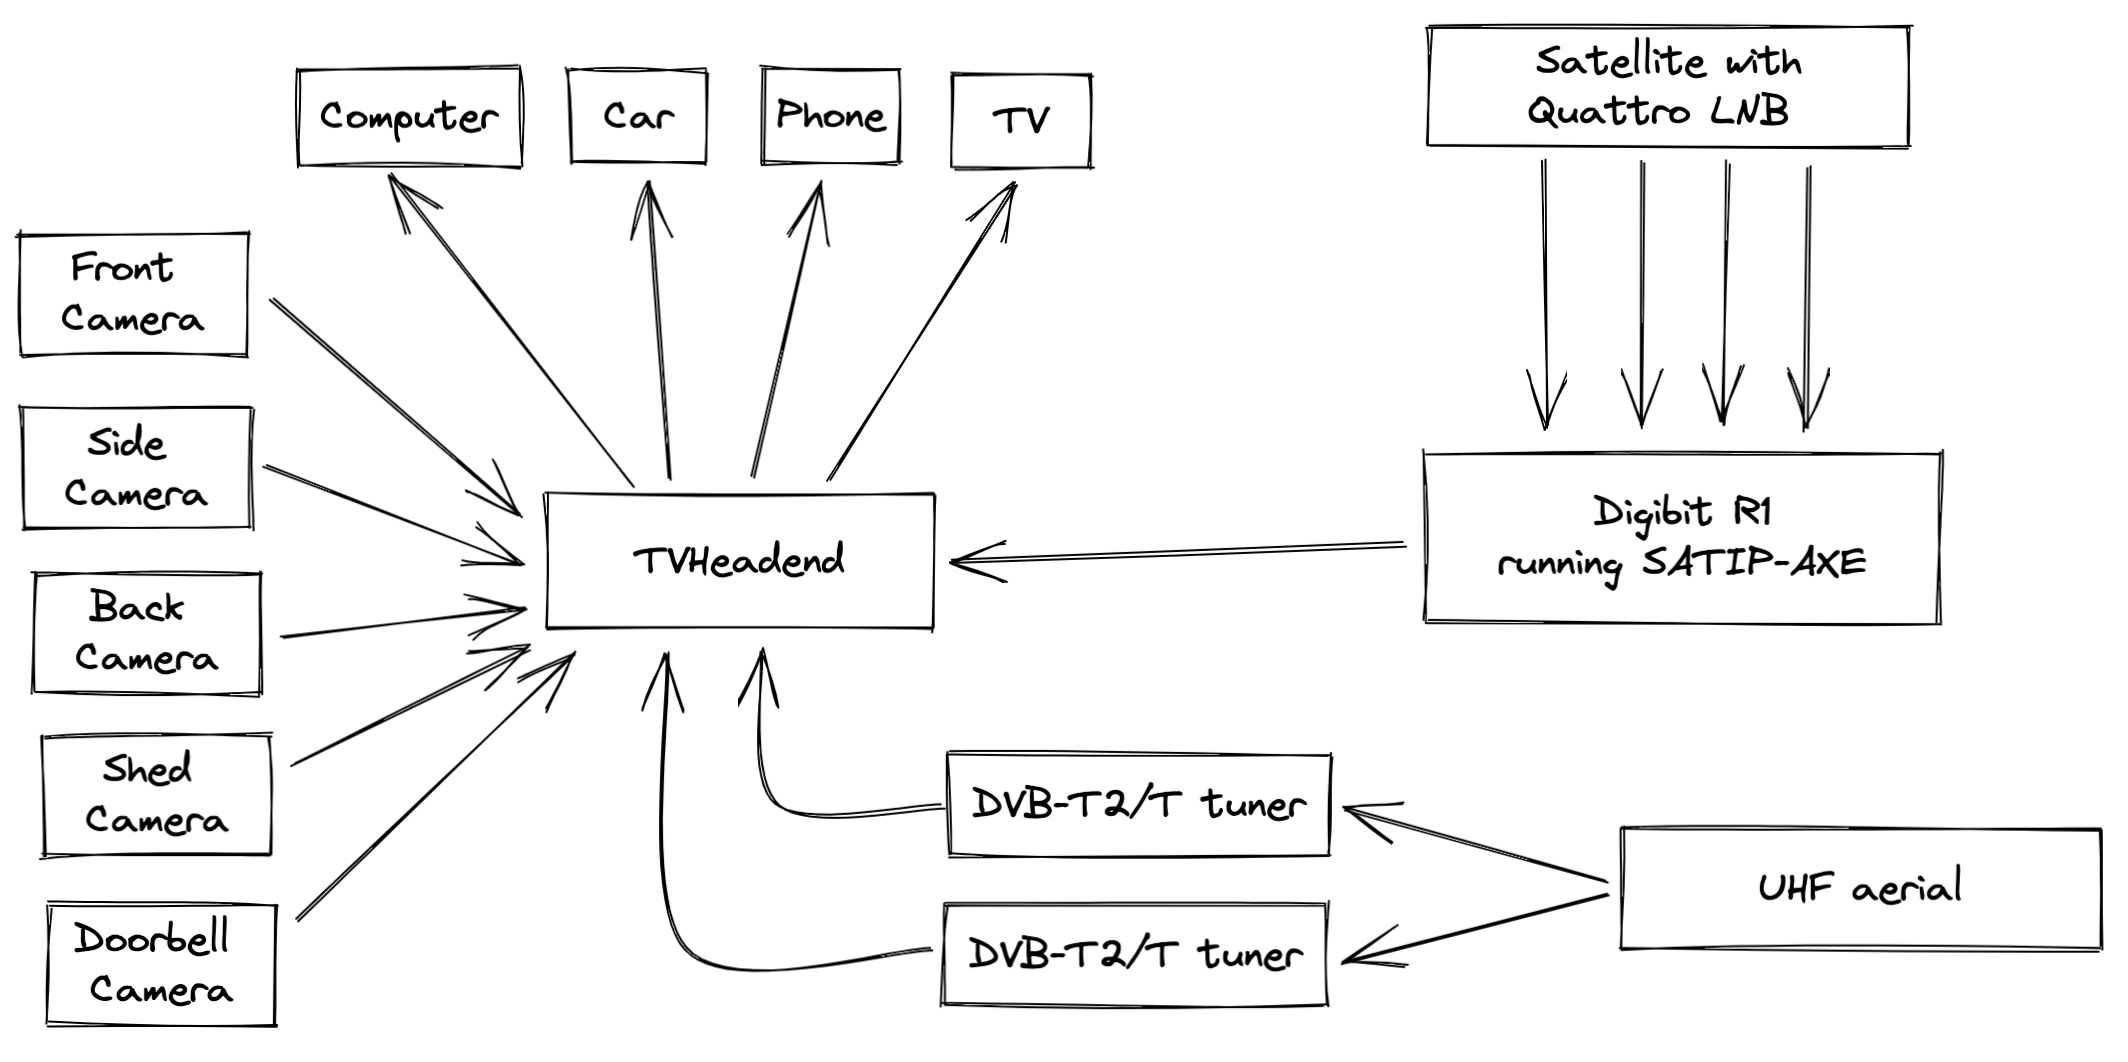
Given these wants, I decided it was best to setup my own IPTV system for distribution of Saorview and FreeSat around my home. Having the content available over the network made accessing it extremely easy and centralising all the decoding to one place allowed for centralised recording.
TVHeadend
TVHeadend is the brains behind this setup, it is responsible for generating the EPGs, communicating with the tuners, providing streams of all the different channels, running scheduled recordings, providing recording playback and the functionality to pause live TV. In addition to this, any RTSP based stream can be advertised via TVHeadend, this enables us to have our CCTV cameras appear as TV channels.
Saorview
Receiving Saorview is straight forward all you need is a UHF aerial and a set top box. However, I had to complicate this, I didn’t want to have a set top box per TV, I wanted the channels to be accessible on more than just my TV and I wanted centralised recordings.
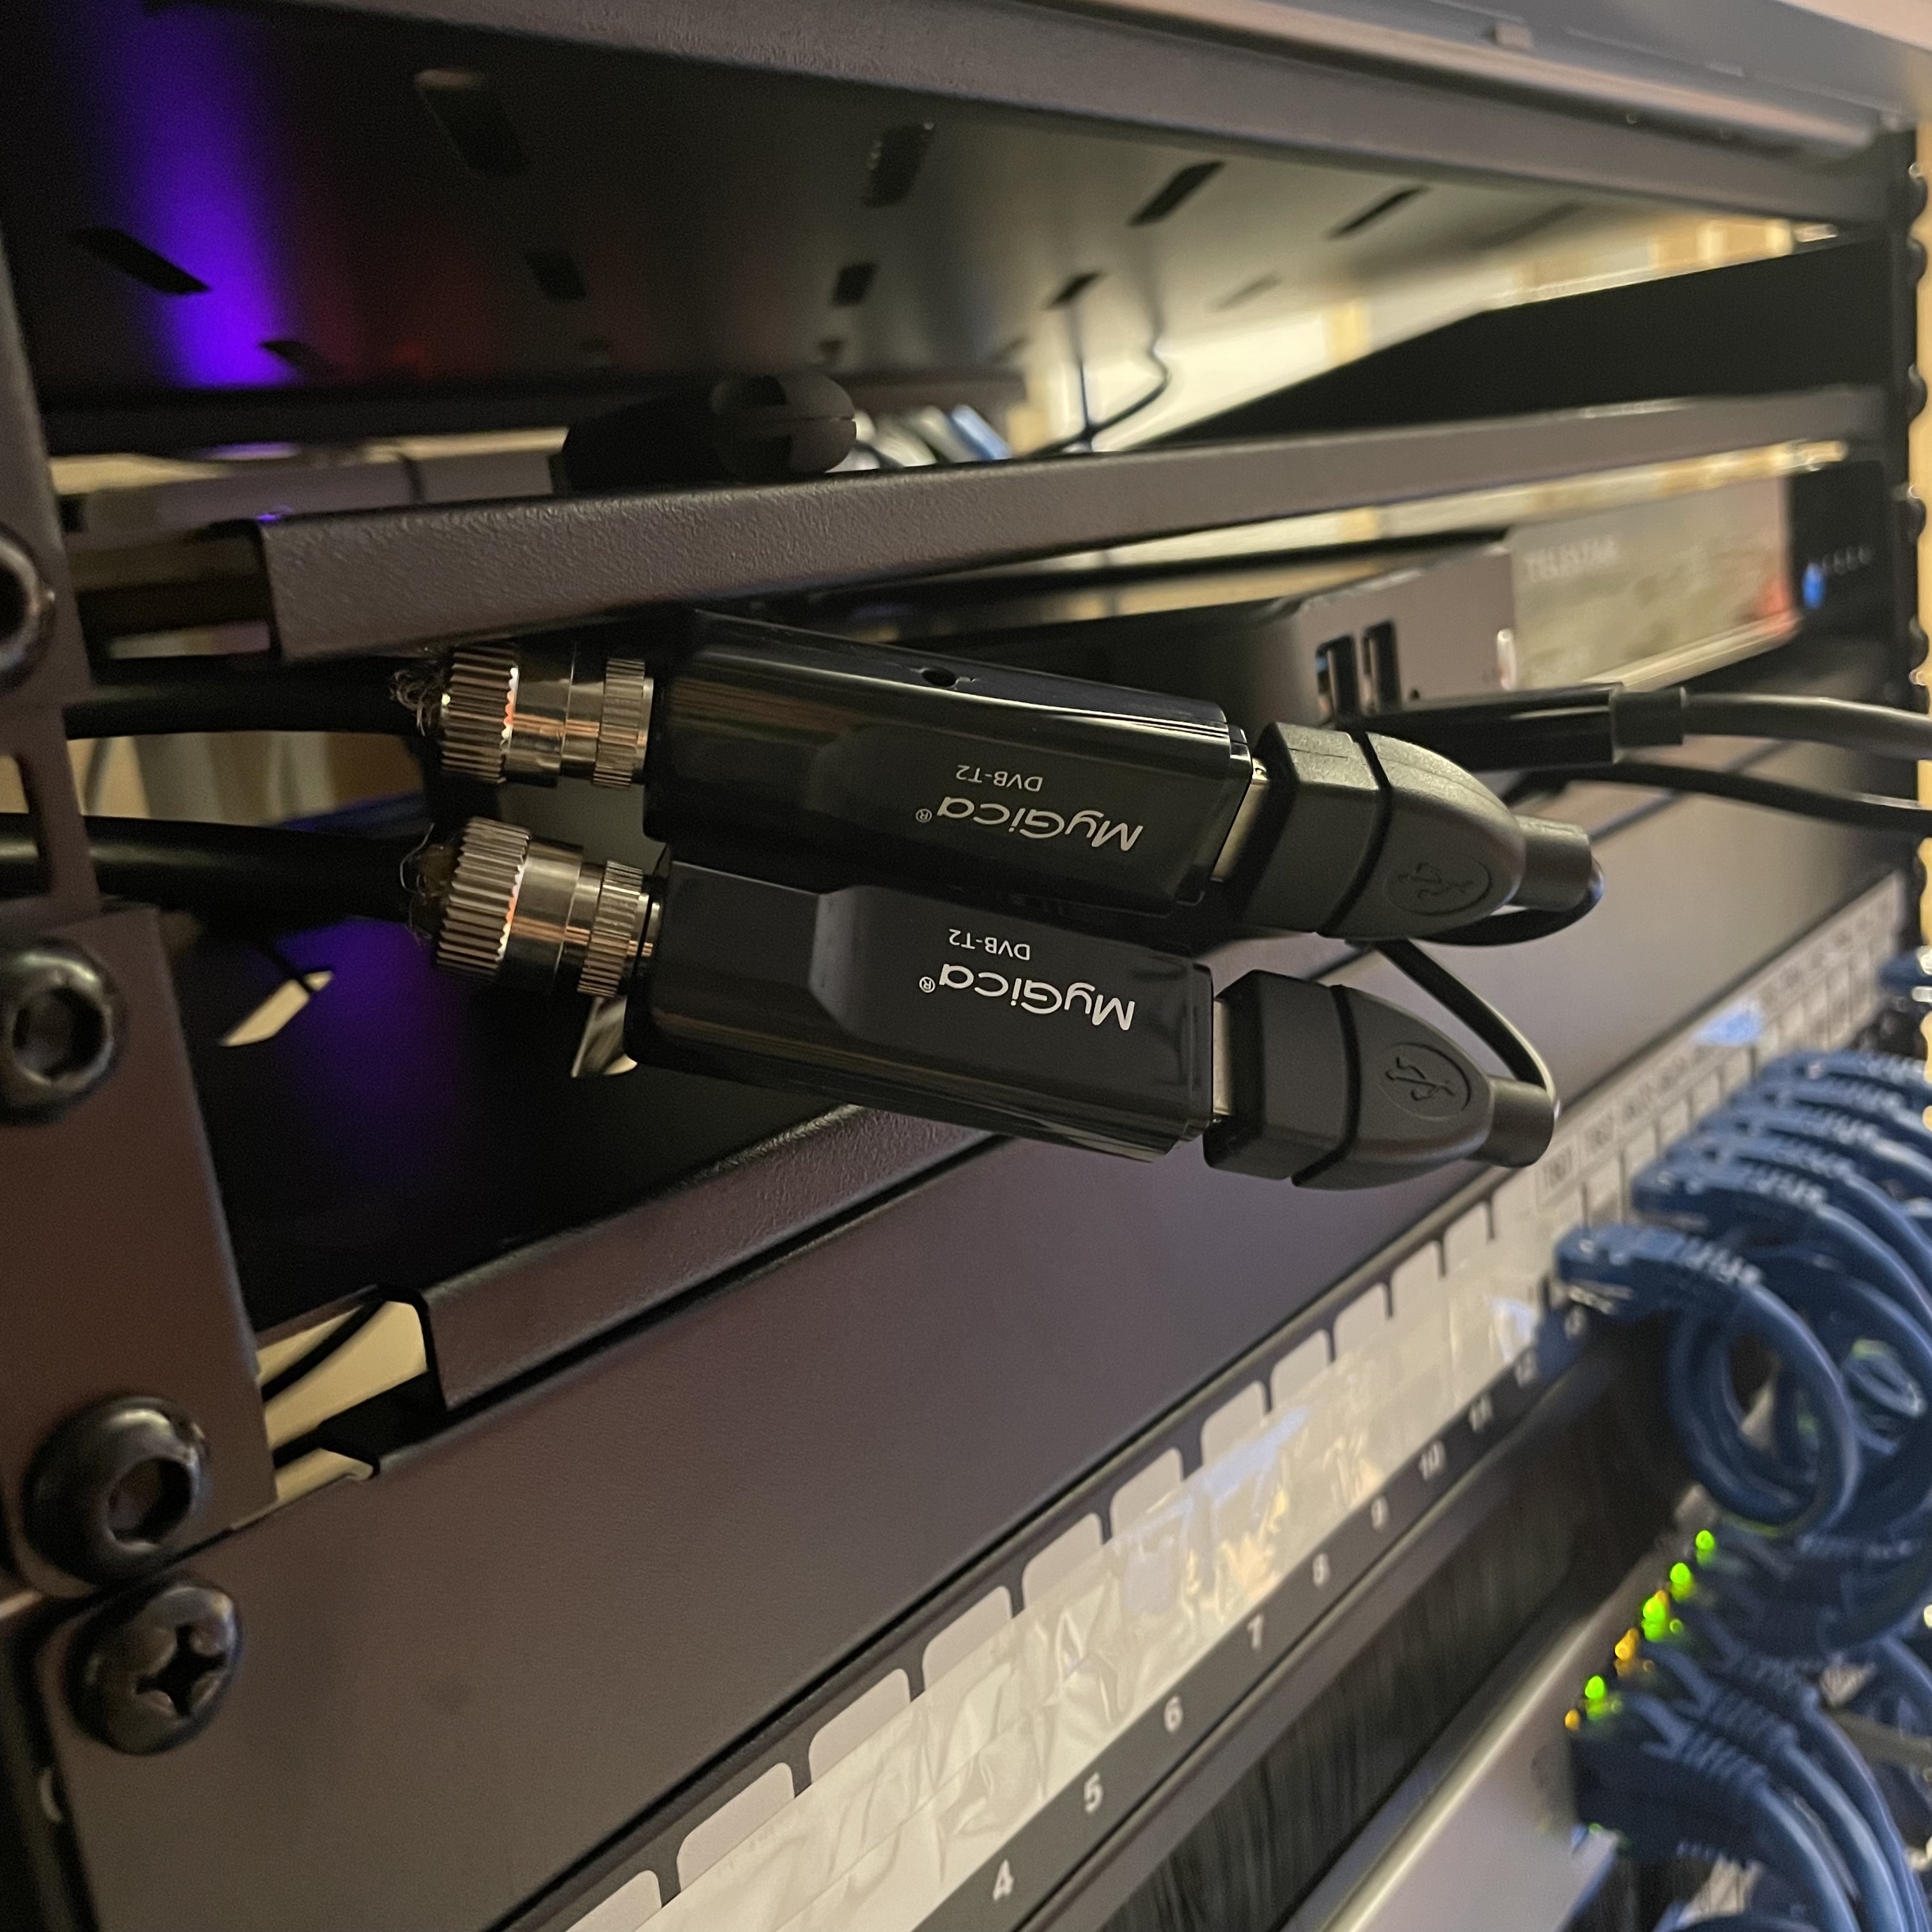
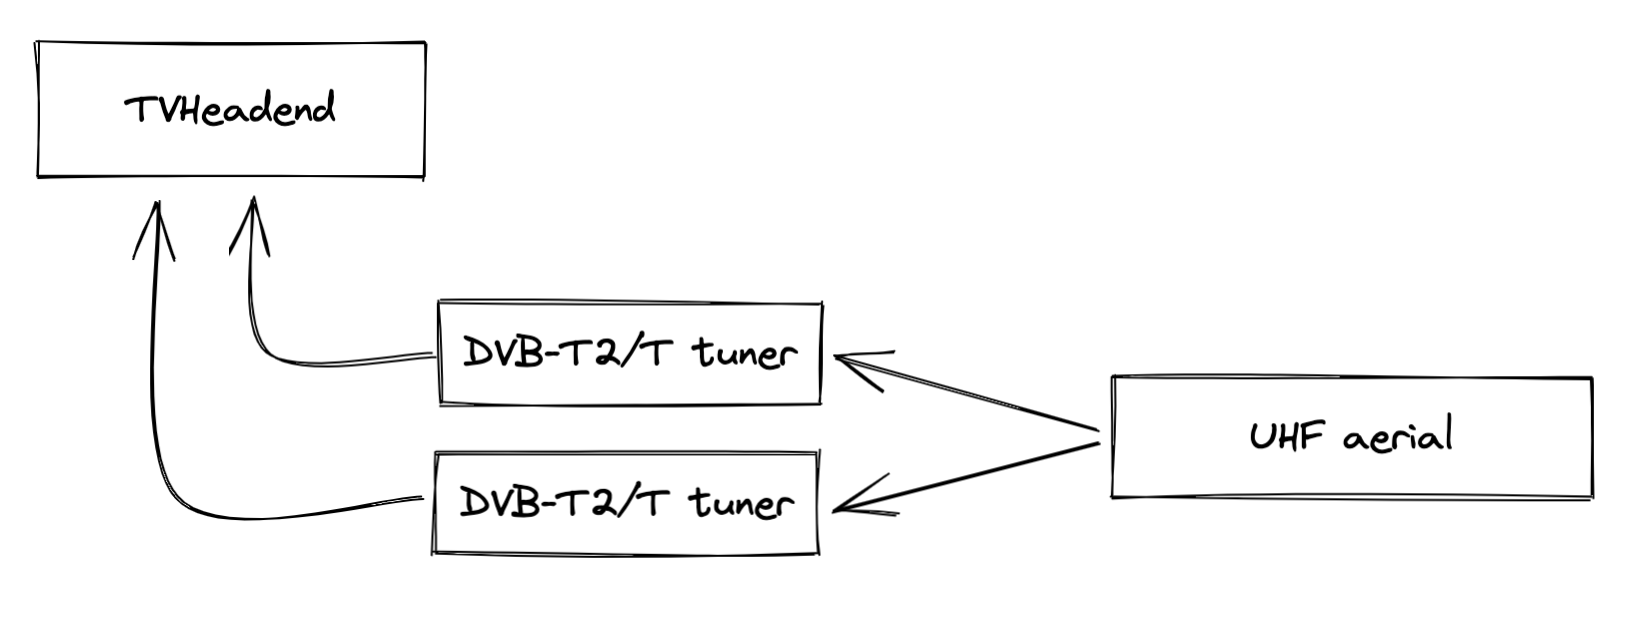
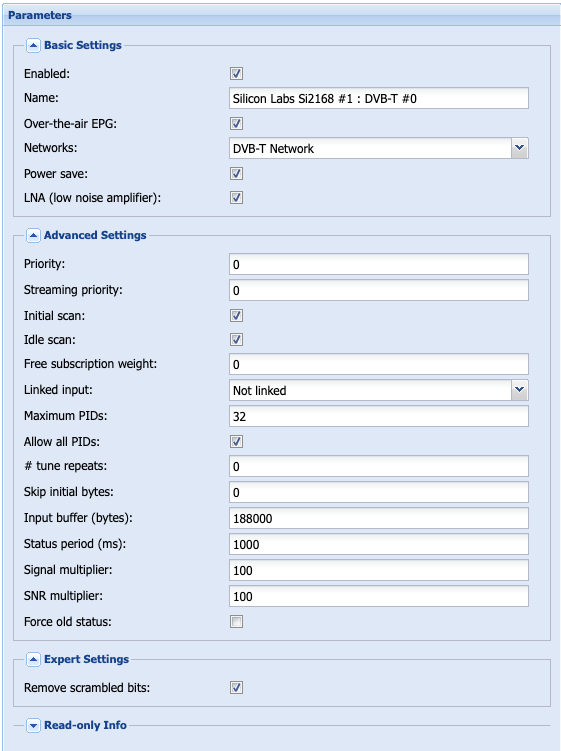
To achieve this I used two (one for each mux) DVB-T2/T tuners, these are plugged directly into the computer running TVHeadend. TVHeadend is configured with the two DVB-T muxes as defined in this document for my nearest transmission station.
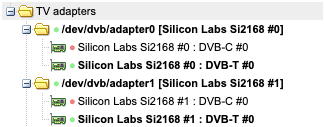
With the adapters plugged into the TVHeadend box they will automatically appear as a “DVB input” on TVHeadend:
The default out of the box settings on TVHeadend worked fine for me. For reference purposes they are included below:
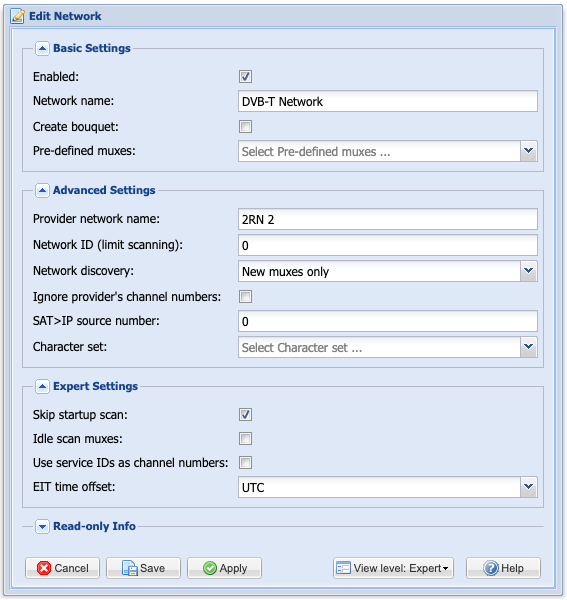
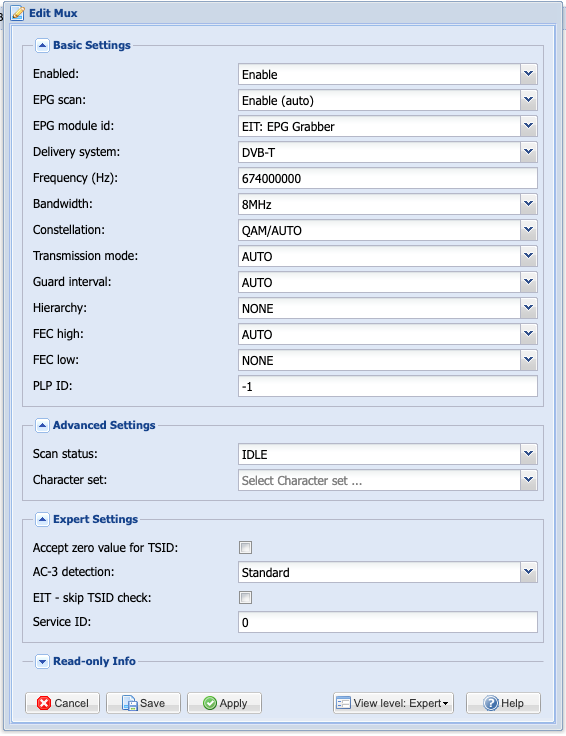
Using the adapters, I created a DVB-T network and configured two muxes as defined by this document:


FreeSat
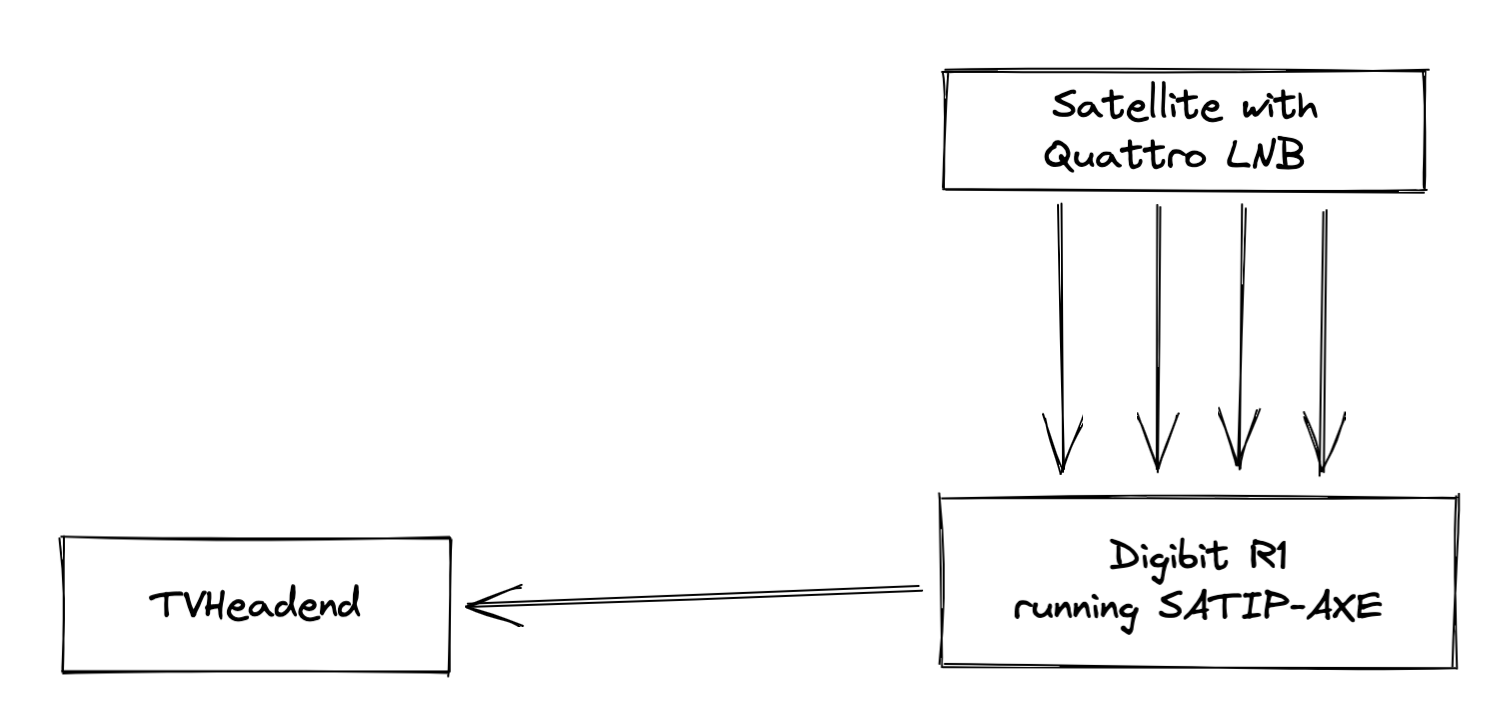
FreeSat is a little bit more complicated, it requires a Satellite connected to a SATIP box which TVHeadend then communicates with over the network receive content.
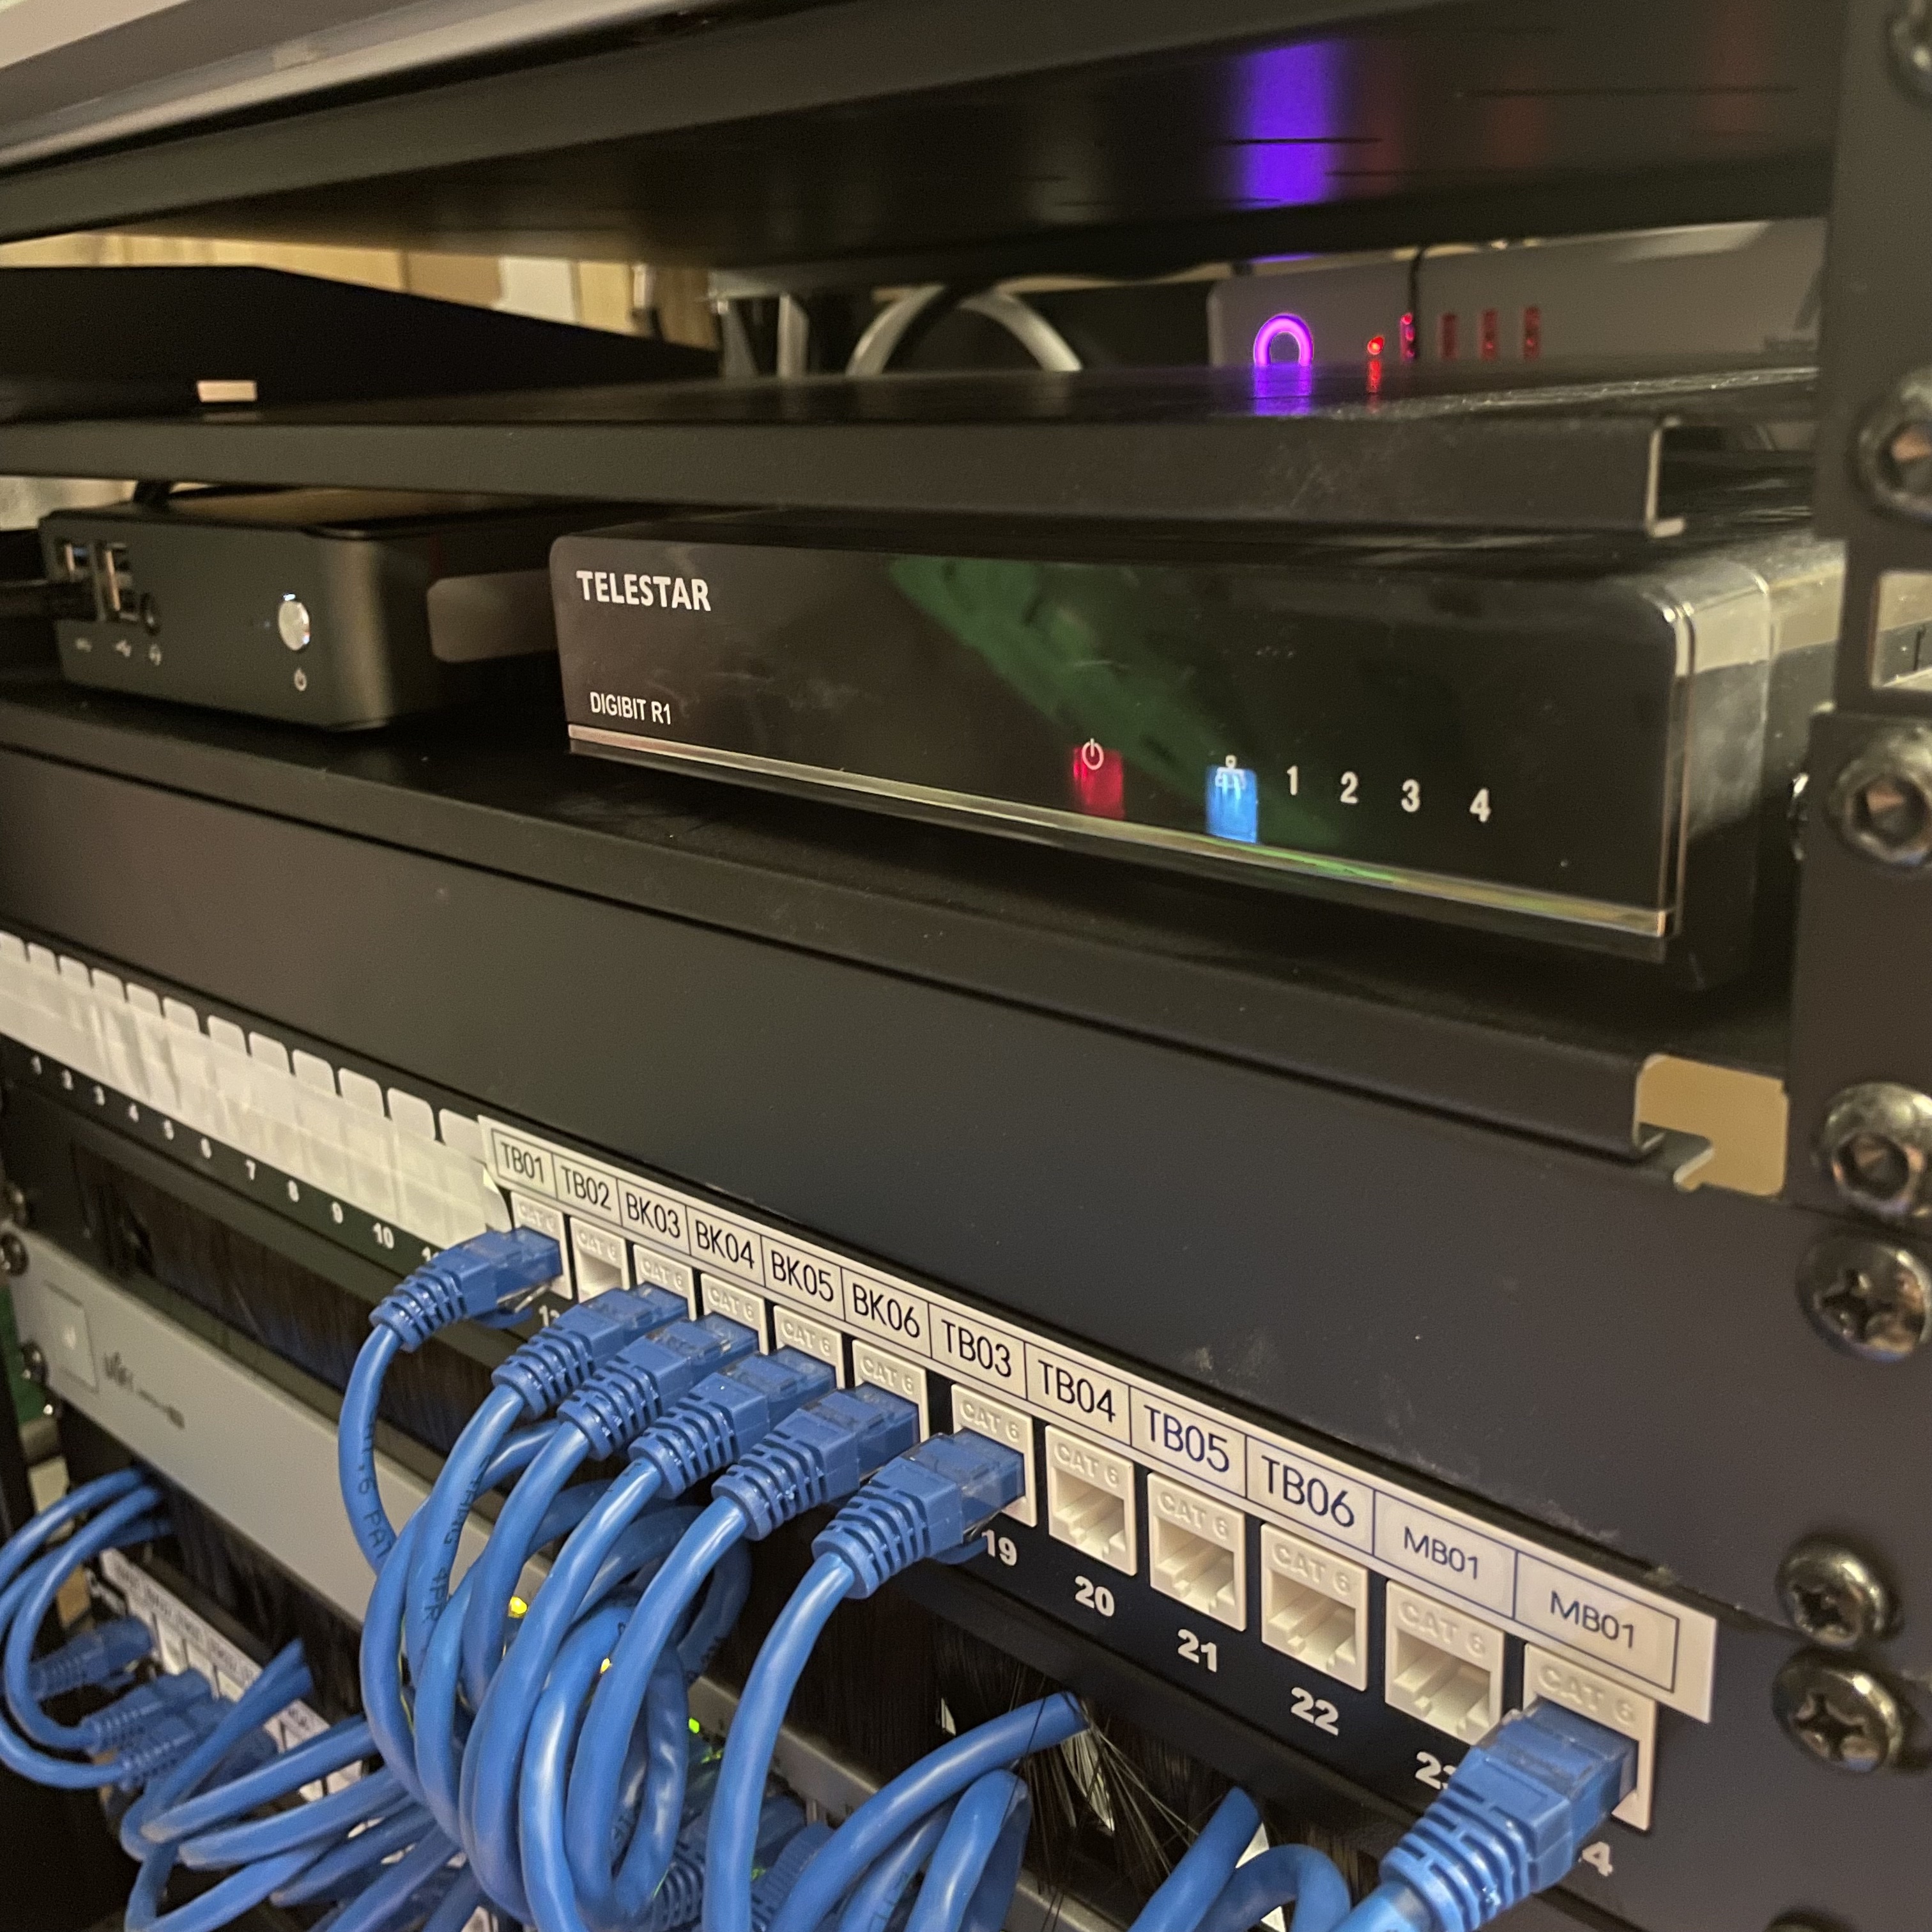
For my SatIP box I used a Digibit R1, it takes all 4 connections to the Quattro LNB on the dish.
To get the best performance and integration with TVHeadend from this system I flashed it with a custom firmware SATIP-AXE which uses minisatip for exposing the content.
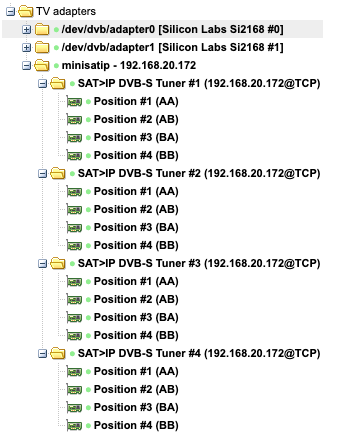
TVHeadend should automatically discover your SATIP box across the network and list it as a DVB Input:
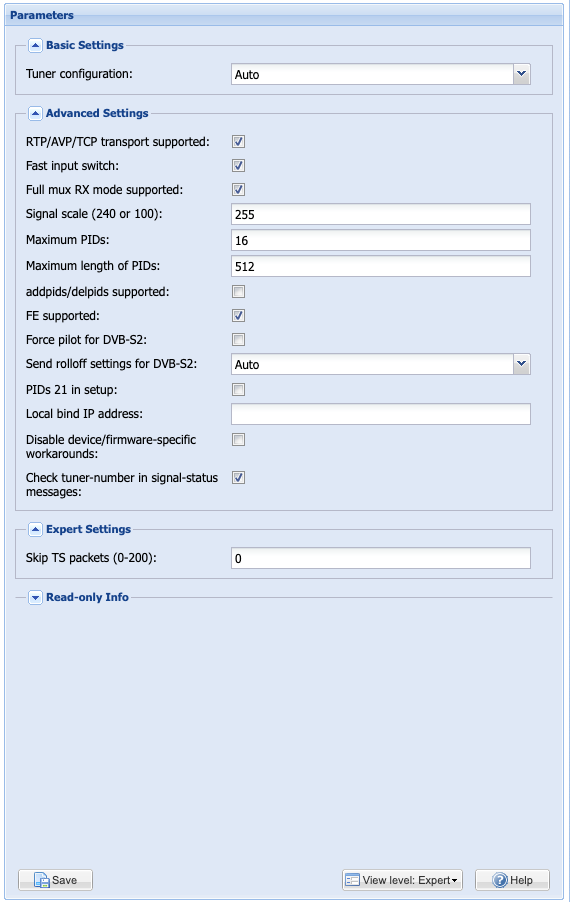
Unlike the DVB-T tuners, for optimal usage some configuration was required, the following configuration can be inputted by clicking on the “minisatip” folder on the “DVB Inputs” screen:
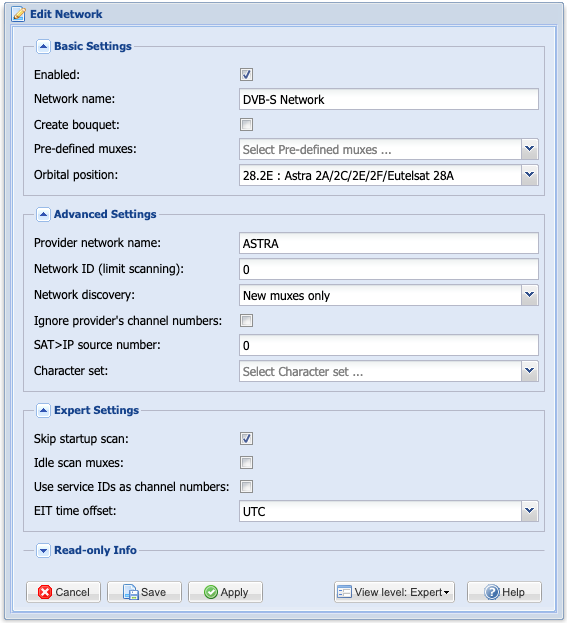
Once configured, similarly to the DVB-T adapters, a DVB-S network can be created, for this we can specify the orbital position of 28.2E Astra and it will automatically configure all if the muxes:
Viewing
As described at the start of this post, I wanted the content to be available on all my different devices. TVHeadend does a fantastic job at providing interfaces to do this.
Computer
For our computers TVHeadend provides a .m3u at /playlist/channels.m3u playlist that can be opened with VLC. Once opened in VLC all of the channels appear as playlist items.
Mobile Phone (iOS)
For our mobile phones TVHeadend has an iOS application. This allows us to view the EPG, watch live TV and configure and watch recordings.
Additionally, if we use port-forwarding to expose the TVHeadend instance to the internet or provide a VPN back into my home network we can access all of the content when away from home.
TV
To standardise the experience on all of our TVs I decided it was best to just use them as dumb displays with a Nvidia Shield attached. This provides us with a fantastic android experience on all TVs.
For Android devices I like to use Kodi as it has a fantastic TVHeadend plugin for providing an EPG, live viewing, recording scheduling and recording viewing.
Car
As my car’s head unit is android based Kodi can be installed and the exact same interface used on the TVs is available within the Car.